
This tutorial was inspired by Chris Jones’ guide, as the steps are very similar.
You Will Need
- Proxmox Virtual Environment
- Windows NT 4 Server ISO
- LSI 53C895A SCSI controller drivers converted to a floppy image.
- Windows NT 4 Service Pack 6 High Encryption version. WinWorld offers the high encryption version of the installer but the standard encryption version of SP6 so it refuses to install. That is why I grabbed SP6 from archive.org instead.
- Universal VBE Video Display Driver converted to an ISO. I used the beta 2015.01.01 version.
- vmmouse driver
- You can use original ISO from VMware tools 3.5.0 ISO on the Wayback Machine copy.
Proxmox preparation
For installing Workstation version of the OS we need to add another Network card in the UI. So go to Proxmox shell terminal and run nano /usr/share/pve-manager/js/pvemanagerlib.js and press Ctr + F and type Intel E1000 and the new line add ['pcnet', 'AMD PcNet'], as it is shown on the image below and save the file.

VM Creation
First upload all the ISO files thorough Proxmox’s web interface. Now create a new VM with these settings.
- General
- ISO Image: winnt40wks_sp1_en.iso
- OS
- Guest OS Type: Microsoft Windows
- Guest OS Version: 2000
- System
- Graphic card: Standard VGA. This will allow for higher resolution settings rather than with the default.
- SCSI Controller: LSI 53C895A
- Disks
- CPU
- Sockets: 1
- Cores: 1
- Type: Pentium. IMPORTANT: The default CPU selection will lead to an immediate BSOD from the installer.
- Memory
- Memory (MiB): 256. 32 or higher will suffice.
- Network
- Model: AMD PCnet card, which NT4 has built-in support for, but it only runs at 10 Mb/s. The RTL8139 allows 100 Mb/s, but the LanmanServer service then fails to start, showing the error: “Not enough server storage is available to process this command.” If you don’t mind this error, you can follow the network tutorial here.
Now we have to make the SCSI drivers available to the Windows installer. It only accepts additional mass storage drivers as a floppy disk. Proxmox lacks a web interface for managing floppies, so this must be configured from the command line.
Replace VM_ID in the following steps with the ID of your VM.
- Transfer lsi_533895a_floppy.img to the Proxmox server and move it to
/var/lib/vz/images/VM_ID/floppy.img. - Open
/etc/pve/qemu-server/VM_ID.conf, add this to the bottom, then save.
args: -drive file=/var/lib/vz/images/VM_ID/floppy.img,if=floppy,index=0OS Installation
- Switch to the VM’s console, start the VM, then begin pressing F6 when you see the Proxmox logo. Keep pressing until you see this screen.
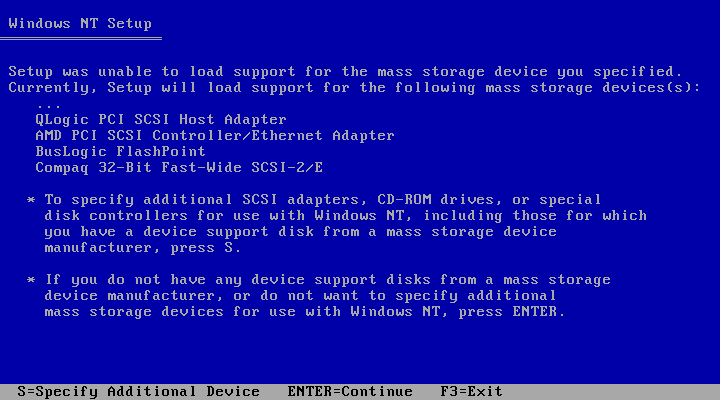
- Press the S key.
- Select Other
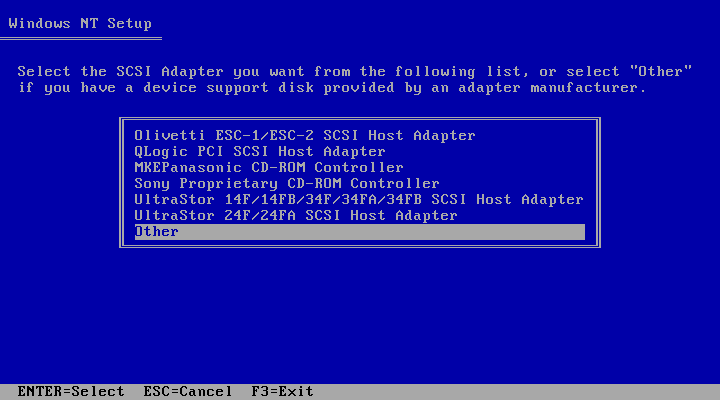
- Press Enter

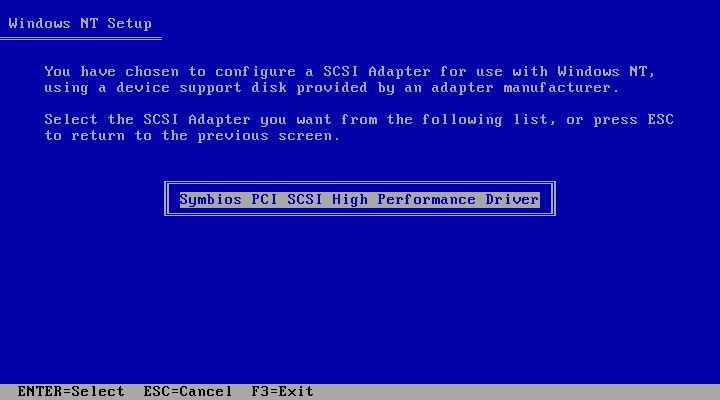
- Press Enter again to select Symbios PCI SCSI High Performance Driver
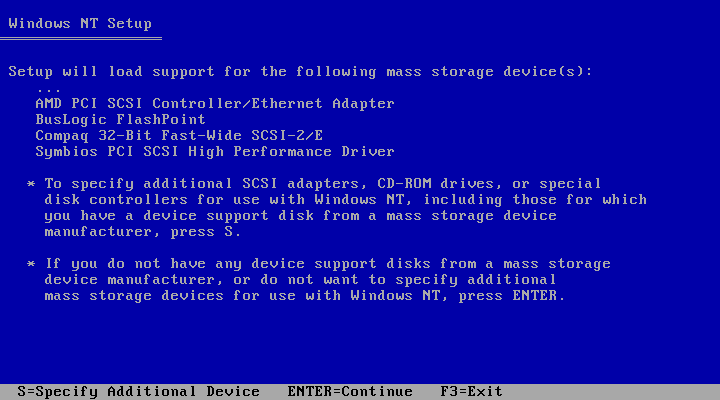
- You should now see Symbios PCI SCSI High Performance Driver in the list of mass storage devices. Press Enter.
- Continue through the installation steps being sure to format the drive as NTFS.
When the graphical installer comes up, you will notice the mouse is difficult to use. We will fix that in a later step. Struggle with the mouse or use the keyboard for the rest of the installation.
- Continue the installation until you get to the Network screen. Click This computer will participate on a network and click Next.
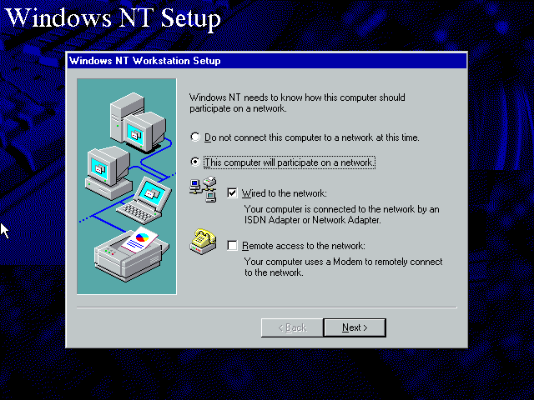
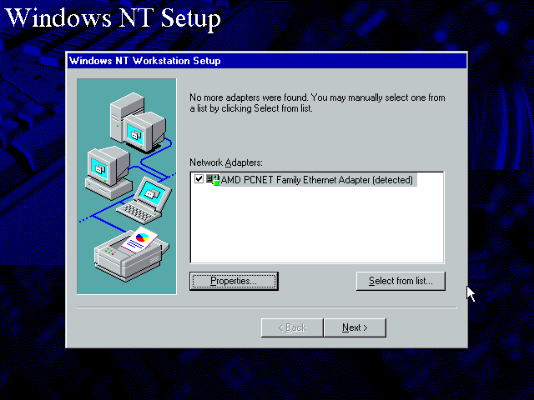
- On the next screen select Start search and after it found AMD PCNET adapter click next.
- Continue through the installer as you want it to be setup.
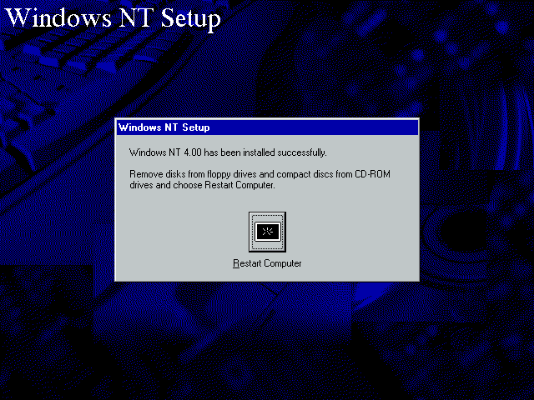
- Finish the installation and restart.
Service Pack 6 Installation
- Press CTRL-ALT-DEL through the Proxmox console and login as Administrator.

- In the VM hardware settings, switch to the ISO containing the Service Pack 6 installer.
- Back in the console, navigate to the CD-ROM drive and run the installer.
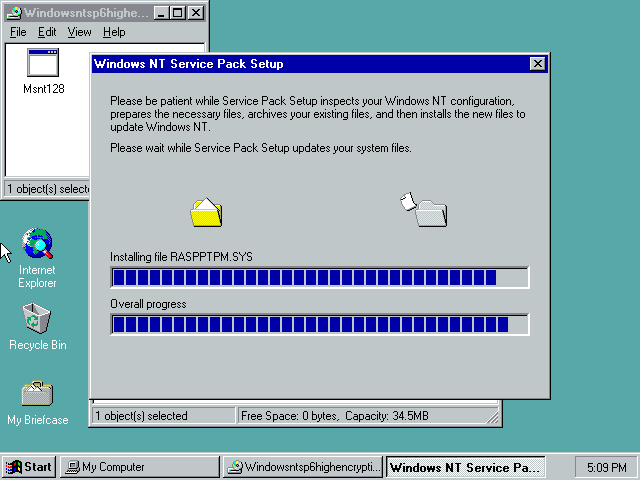
- Reboot.
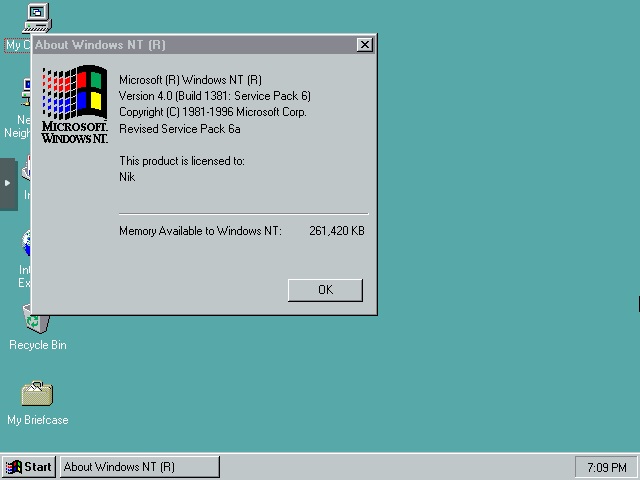
- Go to Start > Run, then run winver to verify your results.
Mouse Drivers
Lets fix the wonky mouse.
- In the VM hardware settings, switch to the ISO mouse.iso.
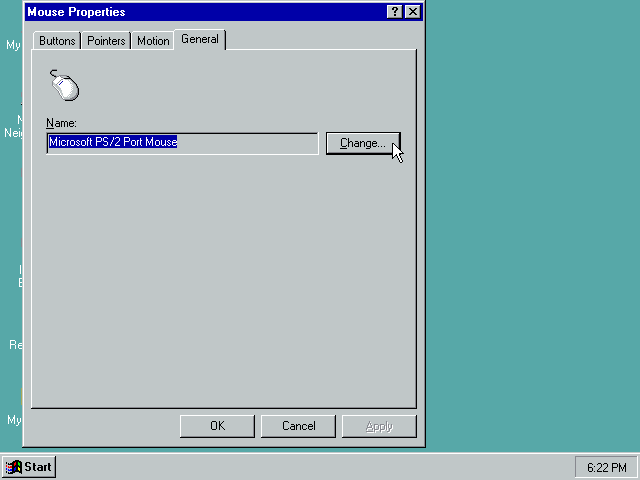
- Back in the console, close the VMware tools installer. Go to Start > Settings > Control Panel > Mouse.
- In the General tab, click Change…
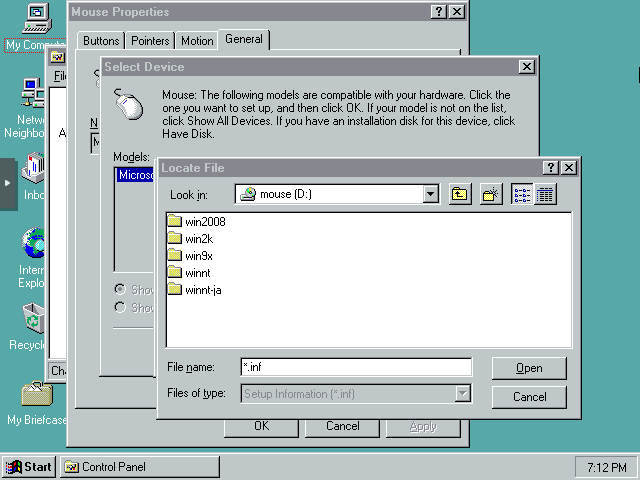
- Click Have Disk…

- Click Browse… and navigate to D:\winnt.
- Finish installing the VMware Pointing Device driver then reboot.
Now the mouse in the VM should be perfectly synchronized.
Display Drivers
This is necessary to get high color and resolution support.
- In the VM hardware settings, switch to the ISO containing the Universal VBE Video Display Driver.
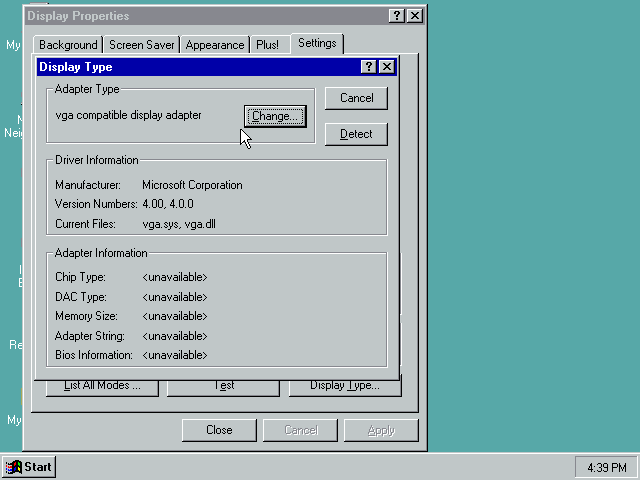
- Back in the console, open Display Properties then click Display Type…

- Click Change...
- Click Have Disk…
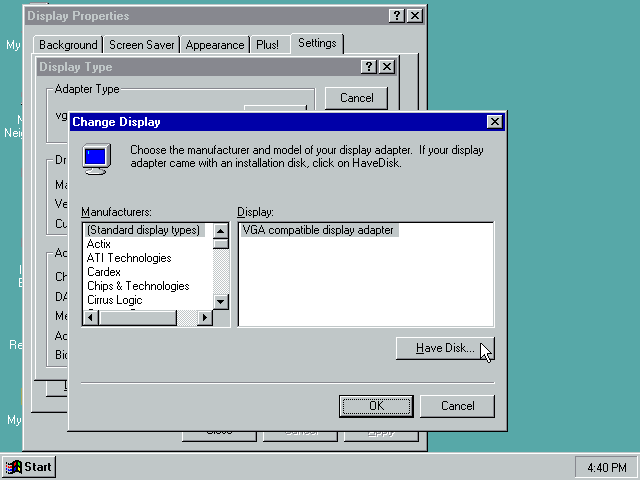
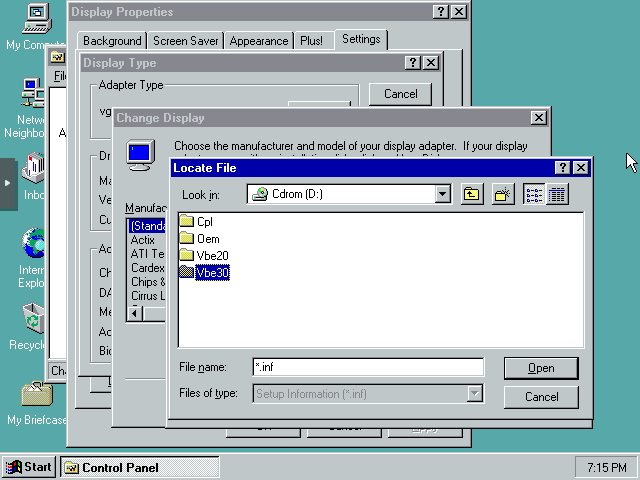
- Click Browse…
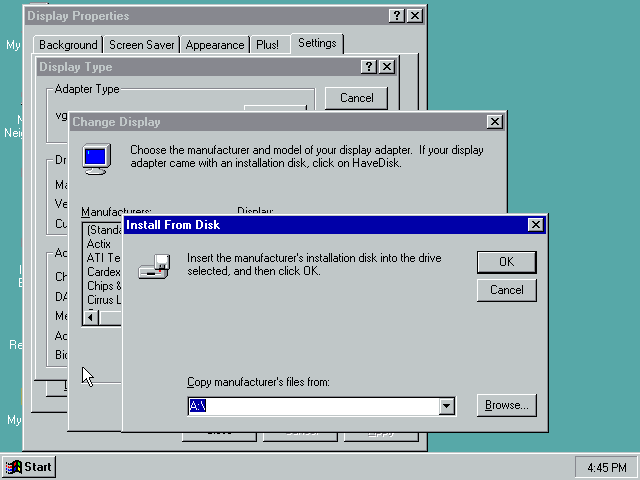
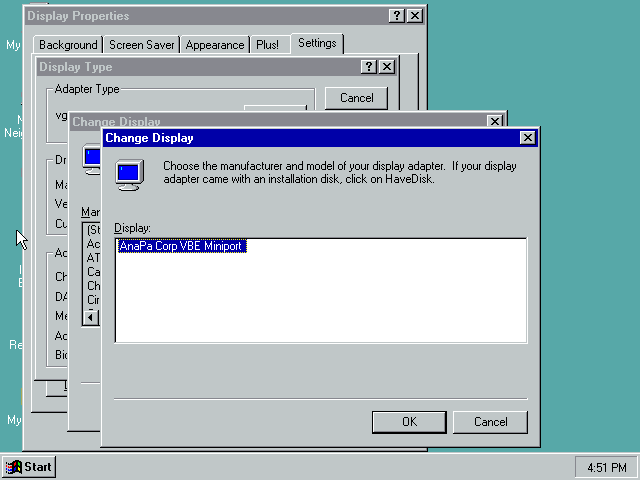
- Navigate to D:\Vbe30\Nt4, then click Open… Then click Ok…
- Install AnaPa Corp VBE Miniport. Then reboot.
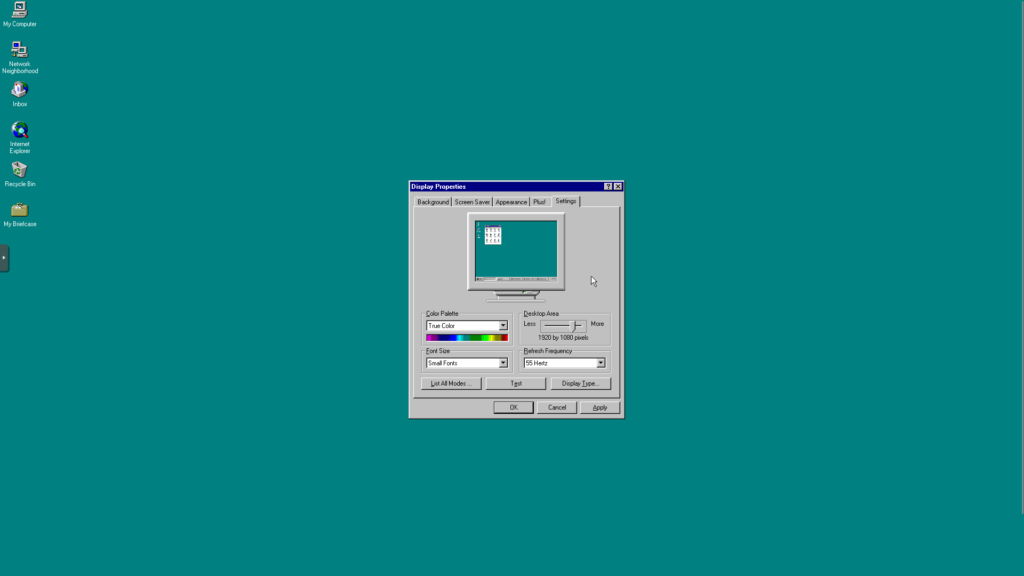
Now you can enjoy Windows NT 4 in true color and high resolution. Here it is at 1080p!
Conclusion
We’ve installed the OS, set it up with better performing SCSI drivers, installed Service Pack 6, made the mouse usable, gave it better graphics, and got it online. Now what?
Thank you so much to Chris Jones who write the original tutorial on how to install Windows NT 4.0 Server on Proxmox you can read here.